If your printer is not listed as being cloud ready, use this guide to setting up cloud printing.
Requirements for setting up cloud printing:
- KODAK All-in-One Printer
- A computer with an Internet connection
- GOOGLE Account — If necessary, create an account.
This procedure explains how to set up your classic printer (not cloud ready) for cloud printing. After you set up the cloud printing service, you will be able to print from your smartphone, tablet, or any computer that is connected to the Internet.
Important: The computer that is connected to the printer must be powered on and connected to the Internet to receive print requests from the cloud printing service.
- Make sure that your computer is connected to the Internet and with a USB cable or via a Wi-Fi or Ethernet network.
- Download and install the latest version of All-in-One Printer Software. Follow the on-screen instructions, including accepting the prompt to upgrade the firmware.
- If you are using GOOGLE CHROME, follow the steps below to make sure the proxy for Google Cloud Print™ is turned off before you install KODAK Cloud Printing Software Connector. This is to prevent your printer from being registered twice. If you are not using GOOGLE CHROME, go to step 4.
- Open GOOGLE CHROME.
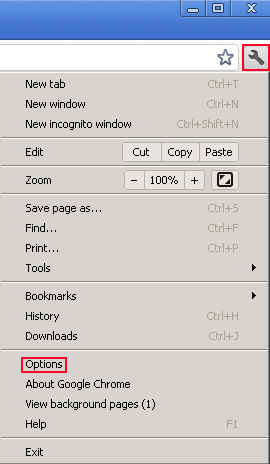
- Click the wrench icon (“Customize and control Google Chrome”) in the top-right corner of the window, then selectOptions.

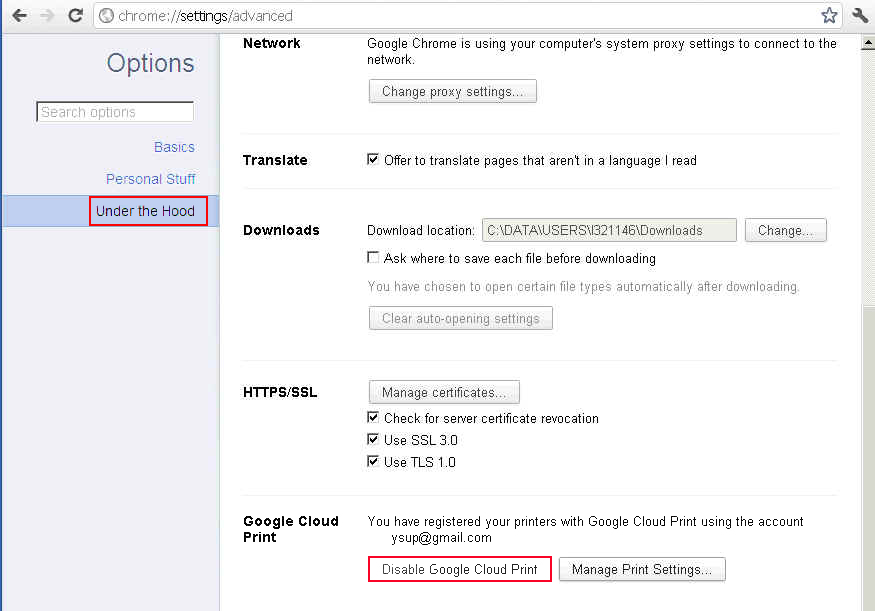
- Select Under the Hood.
- Scroll down until you see “Google Cloud Print”. If Disable Google Cloud Print is displayed, the proxy is turned on.
- Click Disable Google Cloud Print if it is displayed
- Use one of the two methods below to install the KODAK Cloud Printing Software Connector:
- Open Home Center, select Cloud Printing Setup, and follow the on-screen instructions.
- Download from the Web
- Go to www.kodak.com/go/cloudprintingdownloads
- Select the KODAK Cloud Printing Software Connector for your computer operating system.
- Follow the on-screen instructions to download and install the software.
- If necessary, open KODAK Cloud Printing Software Connector.
- Follow the on-screen instructions to sign in using your GOOGLE Account.
Your printer is set up for Google Cloud Print™. - Click Get Email Address for KODAK Printer.
NOTE: A pop-up window may appear asking if you want to get an email address to use KODAK Email Print Service. ClickYes, then click Get Email Address for KODAK Printer. - Follow the on-screen instructions.
The KODAK Email Print Web site opens and assigns an email address to your printer. - Click Enable next to your printer name.
- Make sure you have letter or A4 size paper loaded in the printer.
A page will be sent to your printer to indicate that your printer has been successfully set up. (This may take a few minutes.) the page includes the email address of your printer.
Via: kodak.co.in


