
These days most of the web developers and bloggers are preferring VPS over the normal shared hosting. Virtual Private Server (VPS) is a virtualized server which mimics a dedicated server. It’s like your own copy of an operating system, and you will have root access or superuser level access on it.
The functionality of VPS is equivalent to a dedicated server, you can install and run any software/tools you want. There will be many other similar VPS hosted on the same machine but resources allocated to your VPS will be completely in your control. Other websites or VPS cannot affect your resource and speed of your server & website.
Related Article: Setup Secure Web Server Using Ubuntu 16.04, NGINX, PHP7, MySQL | Install LEMP In 15 Minutes
Maintaining website hosted on VPS can be bit tricky for the person who is not familiar with manual Linux environment, but this difficulty is only until the installation of all necessary tools and till hosting your site on VPS for the first time, maintenance of website is similar to shared hosting where you will get SSH/SFTP access for website and server maintenance.
VPS is always a way faster and secure than normal shared hosting, you just need to install and configure it properly.
In this post I’ll guide you to setup a secure server on Digital Oceans’s 5$ droplet plan by following the easiest possible method, please read the complete post carefully before jumping to server configuration.
Recommended:
1. Create your account on “Digital Ocean“. Digital Ocean is a most popular, reliable and affordable VPS provider. Follow my referral link to get instant discount 10 USD or two months free VPS.
2. Create a 5 $ droplet with Ubuntu 14.04 x64. Click here to know the process.
3. Download server configuration file from here. These server configuration files will be required in later steps.
4. Download and open Putty (Windows user only). For Windows users, putty will work as a terminal to configure your server.
5. Download and install FileZilla.
After creating the droplet following step 1, you will receive an email from Digital Ocean on your registered email address which will have your IP address and temporary root password. Remember it is necessary to change the root password on the first login so be ready with some super strong password.
Connecting to the server using Putty (for Windows users only):-
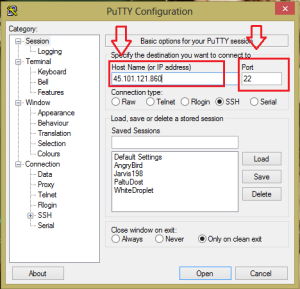
- Open Putty, by default it will open Putty Configuration window.
- Enter your IP address in IP address box, 22 in Port box and click on Open. “Yes” if it asks for continue with the connection.
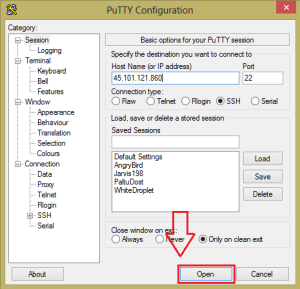
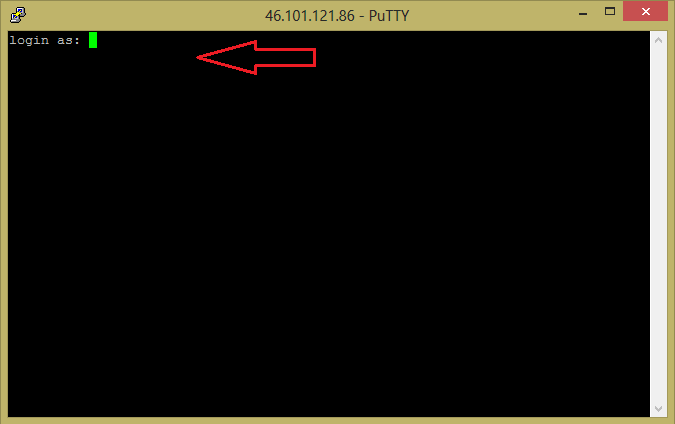
- On the next window, it will ask you for username type root and press enter.
- Now enter the droplet’s root password you have received in your mail form Digital Ocean.
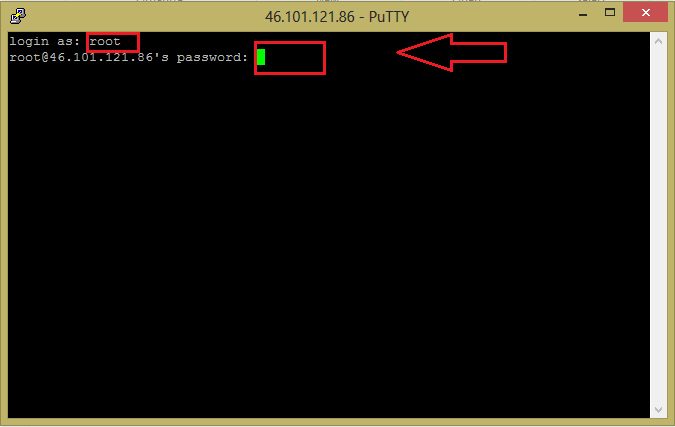
- Since you are using temporary password you need to change it >>> enter the same password once again and then it will ask to enter a new password, enter the new password twice to change the default old password. (Only a single right click can be used to paste the data in Putty).
- Now you are connected to your server.
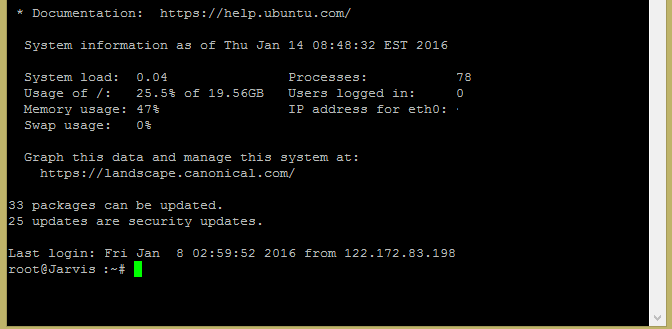
If you have Mac or Ubuntu on your local system then you are lucky, you need not to do all this Putty circus. Open your terminal,
- Type ssh root@IPaddress and hit enter.
- Type Yes and hit Enter to continue with creating the connection.
- Now enter the droplet’s root password you have received in your mail from Digital Ocean.
- It will ask to enter the new password, enter the new password twice to change the default password.
- Now you are connected to your server.
-:- Now Proceed To Setup Secure NGINX Server -:-
Configure and enable Firewall
ufw allow ssh
ufw allow http
ufw logging off
ufw enable
Install and Configure Database On Ubuntu Server:-
MySQL installation will ask you to setup password for the database so keep one strong password ready.
- Type and execute the following command to update the system
apt-get update
- Now install MySQL by running the command
apt-get install mysql-server
- Type Y to confirm the installation.
- Enter database password for user root and move forward.
- After successful installation of MySQL proceeds to the next step.
Install and Configure PHP on Ubuntu 14.04
- Type the following command and press enter to execute.
apt-get install php5-fpm php-pear php5-common php5-mysql php-apc php5-gd
- Type Y to confirm the installation.
This command will install complete PHP package including PHP-FPM system, APC, and the MySQL module.
Now you need to edit few files you can do it in the terminal also but I recommend to do this using FileZilla which will be easier and faster because you have already downloaded those configuration files Step 3.
- Now, open your FileZilla and connect to the server.
- Go to the /etc/php5/fpm/ and replace the previous php.ini file with the php.ini file which you downloaded in step 3.
- Now go to /etc/php5/fpm/pool.d/ and replace the default www.conf file with downloaded www.conf file in step 3.
Install & Configure NGINX On Ubuntu
You need to download the Nginx secure key to verify the package.
- Type cd/tmp and press enter.
- Type and run the following command
wget http://nginx.org/keys/nginx_signing.key
- Run the command
apt-key add /tmp/nginx_signing.key
- Run this two command to add the sources to the APT sources file
echo "deb http://nginx.org/packages/ubuntu/ lucid nginx" >> /etc/apt/sources.list

echo "deb-src http://nginx.org/packages/ubuntu/ lucid nginx" >> /etc/apt/sources.list
- Now run these two following command to download and install NGINX server.
apt-get update
apt-get install nginx
Once again go to FileZilla and navigate to /etc/nginx/conf.d/ directory.
Move “default.conf” and “drop” file to this directory with files downloaded in step 3. Overwrite the file if ask !.
Your server is almost ready, you just need to create a www directory and give it proper permission and ownership.
- Run these commands one by one
mkdir -p /var/www/
chown nginx:nginx /var/www/
chmod 775 /var/www
- Now, you need to restart NGINX server and PHP to do so run this two command one by one.
service nginx restart
service php5-fpm restart
Your server is ready to host the website…
For creating and maintaining database you can use the command which is:-
- mysql -u root -p -> Enter the database password for root what you used during the installation of MySQL
- CREATE DATABASE database_name; -> To create new database
- CREATE USER database_user; -> To create new user
-
GRANT ALL PRIVILEGES ON database_name.* TO "database_user"@"localhost" IDENTIFIED BY "ENTER_A_PASSWORD";
–> it will assign database to user with password
FLUSH PRIVILEGES;
- EXIT
To Import Database Manually:-
- Upload the database file in directory www/
- Run the following command where replace database user, database name and database SQL file name with your own.
mysql -u database_user -p Database_name < /var/www/databse_file_name.sql
It will ask for password of database, you need to enter the password of that specific user for the specific database.
To Export Database:-
- Run the following command where replace database user, database name and database SQL file name with your appropriate data.
mysqldump --opt --user=user_name --password your_password > /var/www/db.sql
If it seems too messy you can install and configure phpMyAdmin, With phpMyAdmin, you will get GUI to perform all these tasks.
- Run following commands one by one to Install & Configure phpMyAdmin:-
sudo apt-get update
sudo apt-get install phpmyadmin
- Accept all pop-ups and enter the MySQL password for the user root when it asks during installation of phpMyAdmin.
- After successful installation of phpMyAdmin, run these following commands:-
sudo php5enmod mcrypt
ln -s /usr/share/phpmyadmin /var/www/
service php5-fpm restart
service nginx restart
That’s all..!!
Related Article: Setup Secure Web Server Using Ubuntu 16.04, NGINX, PHP7, MySQL | Install LEMP In 15 Minutes
If you need any help just leave your query in below comment box. If you don’t want to mess with your server on your own and you are looking to hire someone to server setup and website migration then just drop an email to [email protected].


